Creating Botanical Prints with Found Foliage

Have you ever looked at a fallen leaf or a stray fern and wondered if you could actually turn it into art? This guide walks you through the process of creating botanical prints using found foliage, focusing on two distinct methods: leaf printing with paint and the more delicate art of botanical cyanotypes. You'll learn how to select the right specimens, prepare your surfaces, and achieve crisp, detailed impressions that don't look like a messy smudge. It's a way to bring the outdoors inside without needing expensive specialized equipment.
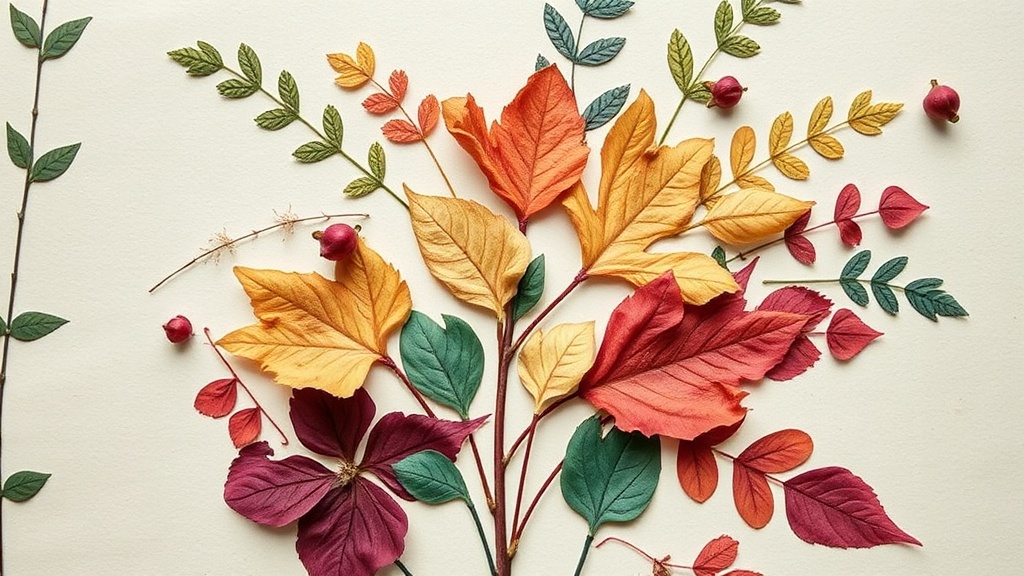
What Kind of Foliage Works Best for Printing?
The best foliage for botanical printing consists of leaves with strong, raised vein structures and a relatively flat surface. You want plants that have a distinct "skeleton" because that's where the ink or light-sensitive chemicals will grab onto the surface.
Ferns are a fantastic choice because their fronds offer intricate, repetitive patterns. Maple or oak leaves also work well due to their deep-set veins. If you're looking for something more subtle, even common ivy can produce beautiful, flowing shapes. Avoid fleshy, succulent leaves like jade or aloe; they tend to be too thick and won't lay flat against your paper, which ruins the print.
A quick tip: look for leaves that are slightly leathery. If a leaf is too soft or wilted, it might bruise under pressure. If it's too brittle, it'll snap. You're looking for that middle ground of structural integrity. It's a bit like choosing the right brush—texture is everything.
When gathering your materials, keep these three categories in mind:
- High Texture: Ferns, Ginkgo leaves, and even dried Eucalyptus.
- Structural Shape: Maple, Oak, and even large Monstera leaves for a modern look.
- Fine Detail: Clover, Queen Anne's Lace, or small herb sprigs like Rosemary.
How Do I Make Botanical Prints with Paint?
To make botanical prints with paint, you simply apply a thin layer of pigment to the back of a leaf and press it onto paper. This is the easiest entry point for most crafters because it requires almost no setup beyond what you likely already have in your studio.
First, pick your medium. I highly recommend using heavy-body acrylic paint or even a high-quality gouache. If you use water-based inks that are too thin, the leaf will soak them up and you'll end up with a blurry mess. You want the paint to sit on the surface of the leaf, not sink into it.
The Step-by-Step Process:
- Clean your specimens: Use a damp cloth to wipe away dirt or dust from your leaves. A dirty leaf equals a messy print.
- Apply the pigment: Turn the leaf over to the underside (the side with the most prominent veins). Use a sponge or a wide brush to apply a thin, even layer of paint. Don't go too thick—if the paint is glopped on, it will bleed outside the edges of the leaf.
- The Press: Lay your leaf onto your paper (watercolor paper or heavy cardstock works best). Place a second piece of paper or a clean sheet of parchment over the top to protect your workspace.
- Apply Pressure: You can use a rolling pin or even the heel of your hand. Apply firm, even pressure across the entire surface. Don't move the leaf once you start pressing, or you'll lose the detail.
- The Reveal: Carefully peel the leaf away from the paper. This is the most exciting part—don't rush it!
If you're worried about your paint drying too fast, you might find gouache to be a more forgiving option for fine details. It stays a bit more predictable than some heavy acrylics.
Sometimes, you'll find that the paint isn't sticking quite right. If that happens, it's usually because the leaf is too dry. You can try lightly misting the leaf with water before applying the paint to "wake up" the surface tension.
What is Cyanotype Printing?
Cyanotype is a photographic printing process that produces a distinctive cyan-blue print using sunlight and UV rays. It's a more advanced method that relies on a chemical reaction rather than physical paint application.
This method is incredibly rewarding because it captures the "ghost" of the plant. Instead of a painted impression, you get a photographic silhouette. It's a bit more technical, but the results are stunningly professional. You'll need to purchase cyanotype liquid or pre-treated paper from a supplier like Amazon or a specialized art store to get started.
The Cyanotype Workflow:
- Prepare the Paper: Either coat your paper with the cyanotype solution or buy pre-sensitized paper. Let it dry in a dark place.
- Arrange your Foliage: Lay your leaves directly on the paper. You can use small weights or even small stones to keep them from moving during the exposure.
- Expose to Light: Place the paper and leaves in direct sunlight. The time required depends on the intensity of the sun—usually between 5 and 20 minutes.
- The Wash: Rinse the paper in plain water. The unexposed areas will turn a deep blue, while the areas covered by the leaves will remain white.
It's worth noting that this process is much more sensitive to light than standard painting. If you're working in a bright room, keep your paper in a drawer or a dark folder until the exact moment you're ready to expose it.
If you're already experimenting with different mediums, you might enjoy making marbled paper with homemade ink, which uses a similar logic of surface tension and pigment control.
| Feature | Paint Printing | Cyanotype |
|---|---|---|
| Difficulty | Beginner | Intermediate/Advanced |
| Primary Tool | Acrylic/Gouache | UV Light & Chemicals |
| Result Style | Textured/Graphic | Photographic Silhouette |
| Setup Time | Fast | Slow (requires drying/exposure) |
Pro Tips for Better Results
Don't get discouraged if your first few tries look a bit blotchy. Even the most seasoned creators run into issues with uneven pressure or too much paint. To get better, you need to experiment with the "weight" of your tools.
If you're using the paint method, try using a sponge rather than a brush. A sponge allows you to control the thickness of the layer much more effectively. A brush can often leave streaks that look messy once the leaf is removed.
Another thing to keep in mind is the type of paper. If you're using very thin paper, the moisture from the paint might cause it to buckle. If you want to avoid this, look for heavy-weight watercolor paper. It provides the structural support needed to handle the pressure of the print-making process.
If you're interested in how different pigments behave on various surfaces, you might find it interesting to look into natural dyeing techniques. While it's a different process, the logic of how color interacts with organic matter is very similar.
Lastly, always keep a "scrap pile" of leaves. Not every leaf is a winner. Some will be too thin, some too brittle, and some just won't hold the pigment. Having a variety of shapes and sizes on hand ensures you always have a backup plan if your first choice doesn't work out.